> ## Documentation Index
> Fetch the complete documentation index at: https://upstash-fix-issues-on-docs.mintlify.site/llms.txt
> Use this file to discover all available pages before exploring further.
# Cloudflare Workers
This is a step by step guide on how to receive webhooks from QStash in your
Cloudflare Worker.
### Project Setup
We will use **C3 (create-cloudflare-cli)** command-line tool to create our functions. You can open a new terminal window and run C3 using the prompt below.
```shell npm
npm create cloudflare@latest
```
```shell yarn
yarn create cloudflare@latest
```
This will install the `create-cloudflare` package, and lead you through setup. C3 will also install Wrangler in projects by default, which helps us testing and deploying the projects.
```text
➜ npm create cloudflare@latest
Need to install the following packages:
create-cloudflare@2.1.0
Ok to proceed? (y) y
using create-cloudflare version 2.1.0
╭ Create an application with Cloudflare Step 1 of 3
│
├ In which directory do you want to create your application?
│ dir ./cloudflare_starter
│
├ What type of application do you want to create?
│ type "Hello World" Worker
│
├ Do you want to use TypeScript?
│ yes typescript
│
├ Copying files from "hello-world" template
│
├ Do you want to use TypeScript?
│ yes typescript
│
├ Retrieving current workerd compatibility date
│ compatibility date 2023-08-07
│
├ Do you want to use git for version control?
│ yes git
│
╰ Application created
```
We will also install the **Upstash QStash library**.
```bash
npm install @upstash/qstash
```
### 3. Use QStash in your handler
First we import the library:
```ts src/index.ts
import { Receiver } from "@upstash/qstash";
```
Then we adjust the `Env` interface to include the `QSTASH_CURRENT_SIGNING_KEY`
and `QSTASH_NEXT_SIGNING_KEY` environment variables.
```ts src/index.ts
export interface Env {
QSTASH_CURRENT_SIGNING_KEY: string;
QSTASH_NEXT_SIGNING_KEY: string;
}
```
And then we validate the signature in the `handler` function.
First we create a new receiver and provide it with the signing keys.
```ts src/index.ts
const receiver = new Receiver({
currentSigningKey: env.QSTASH_CURRENT_SIGNING_KEY,
nextSigningKey: env.QSTASH_NEXT_SIGNING_KEY,
});
```
Then we verify the signature.
```ts src/index.ts
const body = await request.text();
const isValid = receiver.verify({
signature: request.headers.get("Upstash-Signature")!,
body,
});
```
The entire file looks like this now:
```ts src/index.ts
import { Receiver } from "@upstash/qstash";
export interface Env {
QSTASH_CURRENT_SIGNING_KEY: string;
QSTASH_NEXT_SIGNING_KEY: string;
}
export default {
async fetch(
request: Request,
env: Env,
ctx: ExecutionContext
): Promise {
const c = new Receiver({
currentSigningKey: env.QSTASH_CURRENT_SIGNING_KEY,
nextSigningKey: env.QSTASH_NEXT_SIGNING_KEY,
});
const body = await request.text();
const isValid = await c
.verify({
signature: request.headers.get("Upstash-Signature")!,
body,
})
.catch((err) => {
console.error(err);
return false;
});
if (!isValid) {
return new Response("Invalid signature", { status: 401 });
}
console.log("The signature was valid");
// do work here
return new Response("Hello World!");
},
};
```
### Configure Credentials
There are two methods for setting up the credentials for QStash. The recommended way is to use Cloudflare Upstash Integration. Alternatively, you can add the credentials manually.
#### Using the Cloudflare Integration
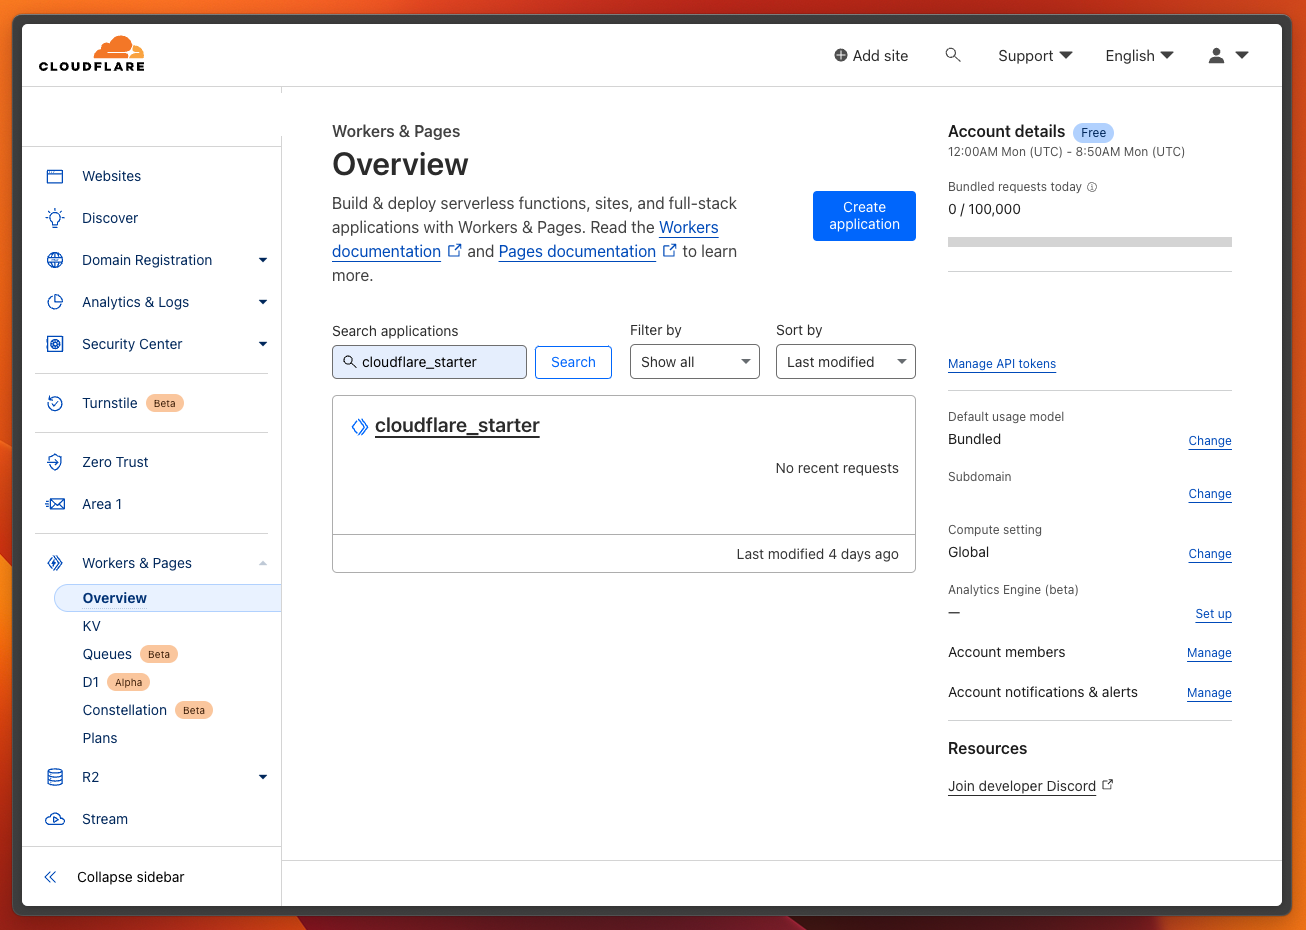
Access to the [Cloudflare Dashboard](https://dash.cloudflare.com) and login with the same account that you've used while setting up the Worker application. Then, navigate to **Workers & Pages > Overview** section on the sidebar. Here, you'll find your application listed.
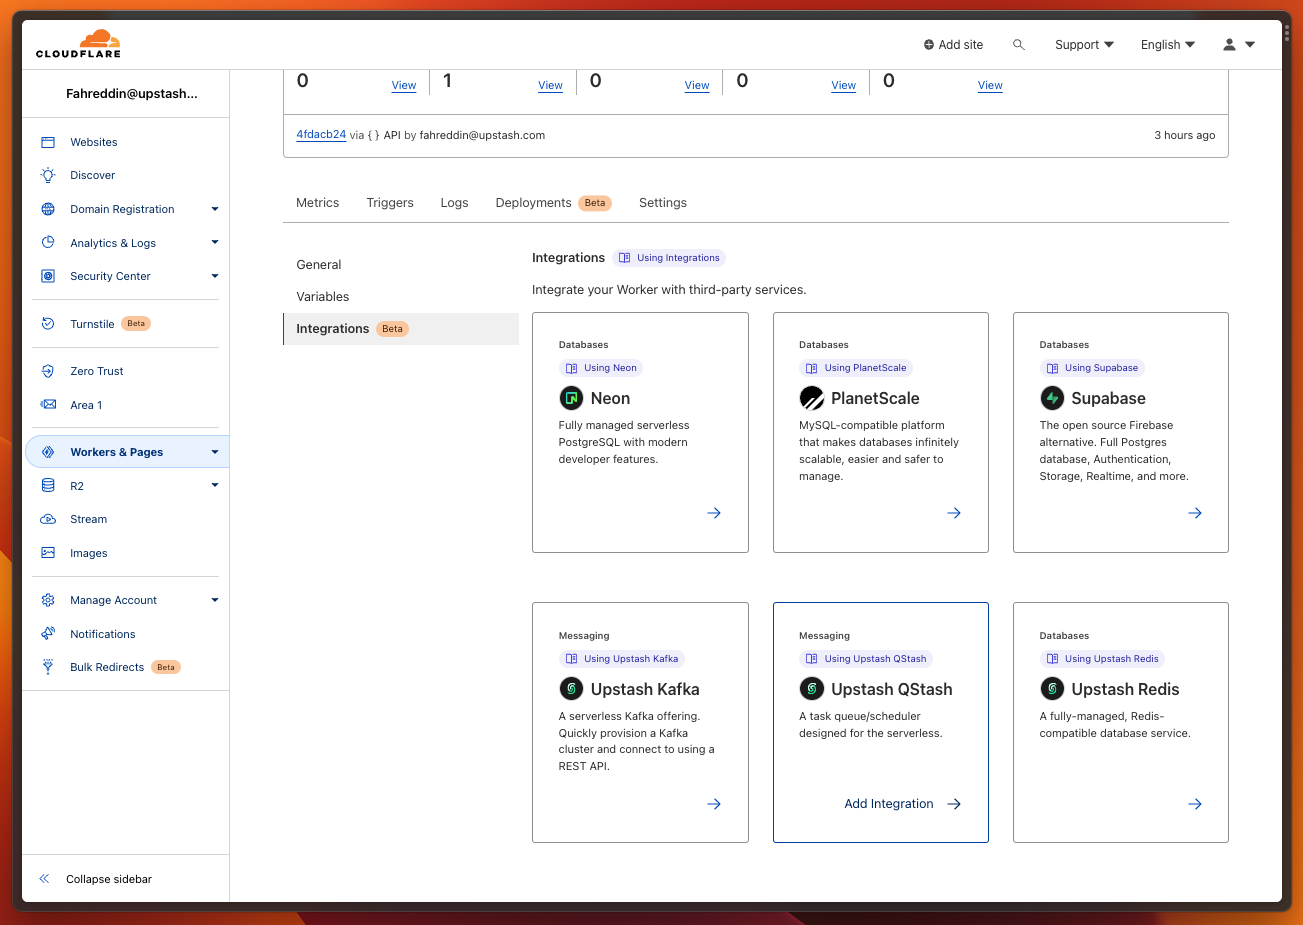
 Clicking on the application will direct you to the application details page, where you can perform the integration process. Switch to the **Settings** tab in the application details, and proceed to **Integrations** section. You will see various Worker integrations listed. To proceed, click the **Add Integration** button associated with the QStash.
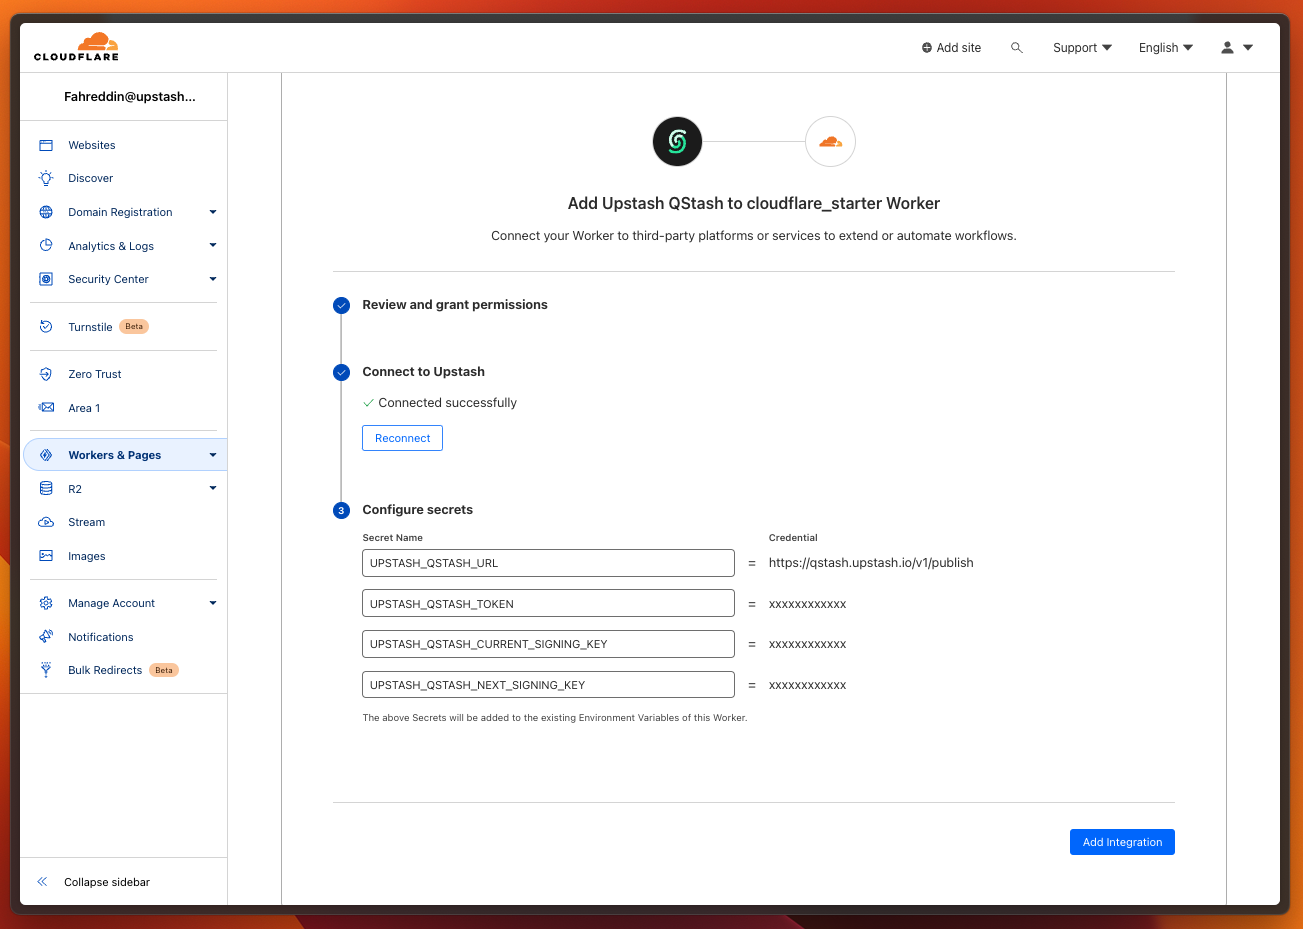
 On the Integration page, connect to your Upstash account. Then, select the related database from the dropdown menu. Finalize the process by pressing Save button.
 #### Setting up Manually
Navigate to [Upstash Console](https://console.upstash.com) and copy/paste your QStash credentials to `wrangler.toml` as below.
```yaml
[vars]
QSTASH_URL="REPLACE_HERE"
QSTASH_TOKEN="REPLACE_HERE"
QSTASH_CURRENT_SIGNING_KEY="REPLACE_HERE"
QSTASH_NEXT_SIGNING_KEY="REPLACE_HERE"
```
### Test and Deploy
You can test the function locally with `npx wrangler dev`
Deploy your function to Cloudflare with `npx wrangler deploy`
The endpoint of the function will be provided to you, once the deployment is done.
### Publish a message
Open a different terminal and publish a message to QStash. Note the destination
url is the same that was printed in the previous deploy step.
```bash
curl --request POST "https://qstash.upstash.io/v2/publish/https://cloudflare-workers.upstash.workers.dev" \
-H "Authorization: Bearer " \
-H "Content-Type: application/json" \
-d "{ \"hello\": \"world\"}"
```
In the logs you should see something like this:
```bash
$ npx wrangler tail
⛅️ wrangler 2.0.17
--------------------
Retrieving cached values for account from node_modules/.cache/wrangler
Successfully created tail, expires at 2022-07-11T21:11:36Z
Connected to cloudflare-workers, waiting for logs...
POST https://cloudflare-workers.upstash.workers.dev/ - Ok @ 7/11/2022, 5:13:19 PM
(log) The signature was valid
```
## Next Steps
That's it, you have successfully created a secure Cloudflare Worker, that
receives and verifies incoming webhooks from qstash.
Learn more about publishing a message to qstash [here](/qstash/howto/publishing).
You can find the source code [here](https://github.com/upstash/qstash-examples/tree/main/cloudflare-workers).
#### Setting up Manually
Navigate to [Upstash Console](https://console.upstash.com) and copy/paste your QStash credentials to `wrangler.toml` as below.
```yaml
[vars]
QSTASH_URL="REPLACE_HERE"
QSTASH_TOKEN="REPLACE_HERE"
QSTASH_CURRENT_SIGNING_KEY="REPLACE_HERE"
QSTASH_NEXT_SIGNING_KEY="REPLACE_HERE"
```
### Test and Deploy
You can test the function locally with `npx wrangler dev`
Deploy your function to Cloudflare with `npx wrangler deploy`
The endpoint of the function will be provided to you, once the deployment is done.
### Publish a message
Open a different terminal and publish a message to QStash. Note the destination
url is the same that was printed in the previous deploy step.
```bash
curl --request POST "https://qstash.upstash.io/v2/publish/https://cloudflare-workers.upstash.workers.dev" \
-H "Authorization: Bearer " \
-H "Content-Type: application/json" \
-d "{ \"hello\": \"world\"}"
```
In the logs you should see something like this:
```bash
$ npx wrangler tail
⛅️ wrangler 2.0.17
--------------------
Retrieving cached values for account from node_modules/.cache/wrangler
Successfully created tail, expires at 2022-07-11T21:11:36Z
Connected to cloudflare-workers, waiting for logs...
POST https://cloudflare-workers.upstash.workers.dev/ - Ok @ 7/11/2022, 5:13:19 PM
(log) The signature was valid
```
## Next Steps
That's it, you have successfully created a secure Cloudflare Worker, that
receives and verifies incoming webhooks from qstash.
Learn more about publishing a message to qstash [here](/qstash/howto/publishing).
You can find the source code [here](https://github.com/upstash/qstash-examples/tree/main/cloudflare-workers).