> ## Documentation Index
> Fetch the complete documentation index at: https://upstash-fix-issues-on-docs.mintlify.site/llms.txt
> Use this file to discover all available pages before exploring further.
# DigitalOcean
Upstash has native integration with [DigitalOcean Add-On
Marketplace](https://marketplace.digitalocean.com/add-ons/upstash-redis).
This quickstart shows how to create an Upstash for Redis® Database from
DigitalOcean Add-On Marketplace.
### Database Setup
Creating Upstash for Redis Database requires a DigitalOcean account.
[Login or Sign-up](https://cloud.digitalocean.com/login) for DigitalOcean
account. Then navigate the
[Upstash Redis Marketplace](https://marketplace.digitalocean.com/add-ons/upstash-redis)
page.
Click `Add Upstash Redis` button. Now setup page will open and it will ask
`Database Name / Plan / Region` info.
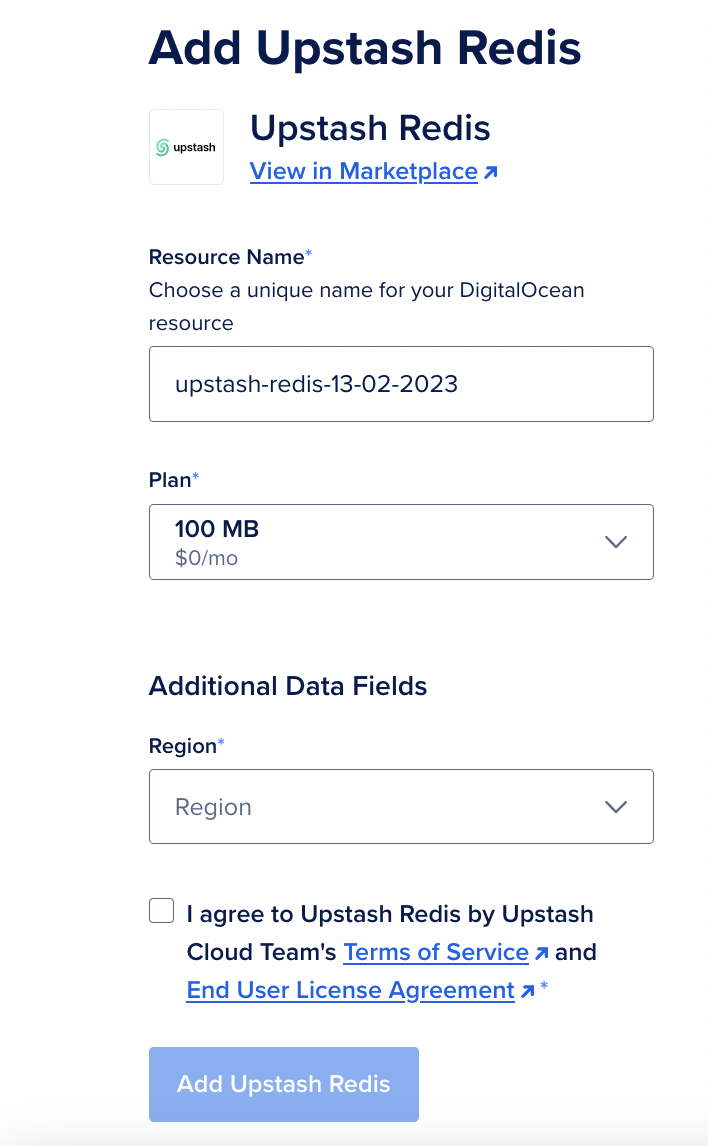 After selecting Name, Plan and Region, click `Add Upstash Redis` button.
### Connecting to Database - SSO
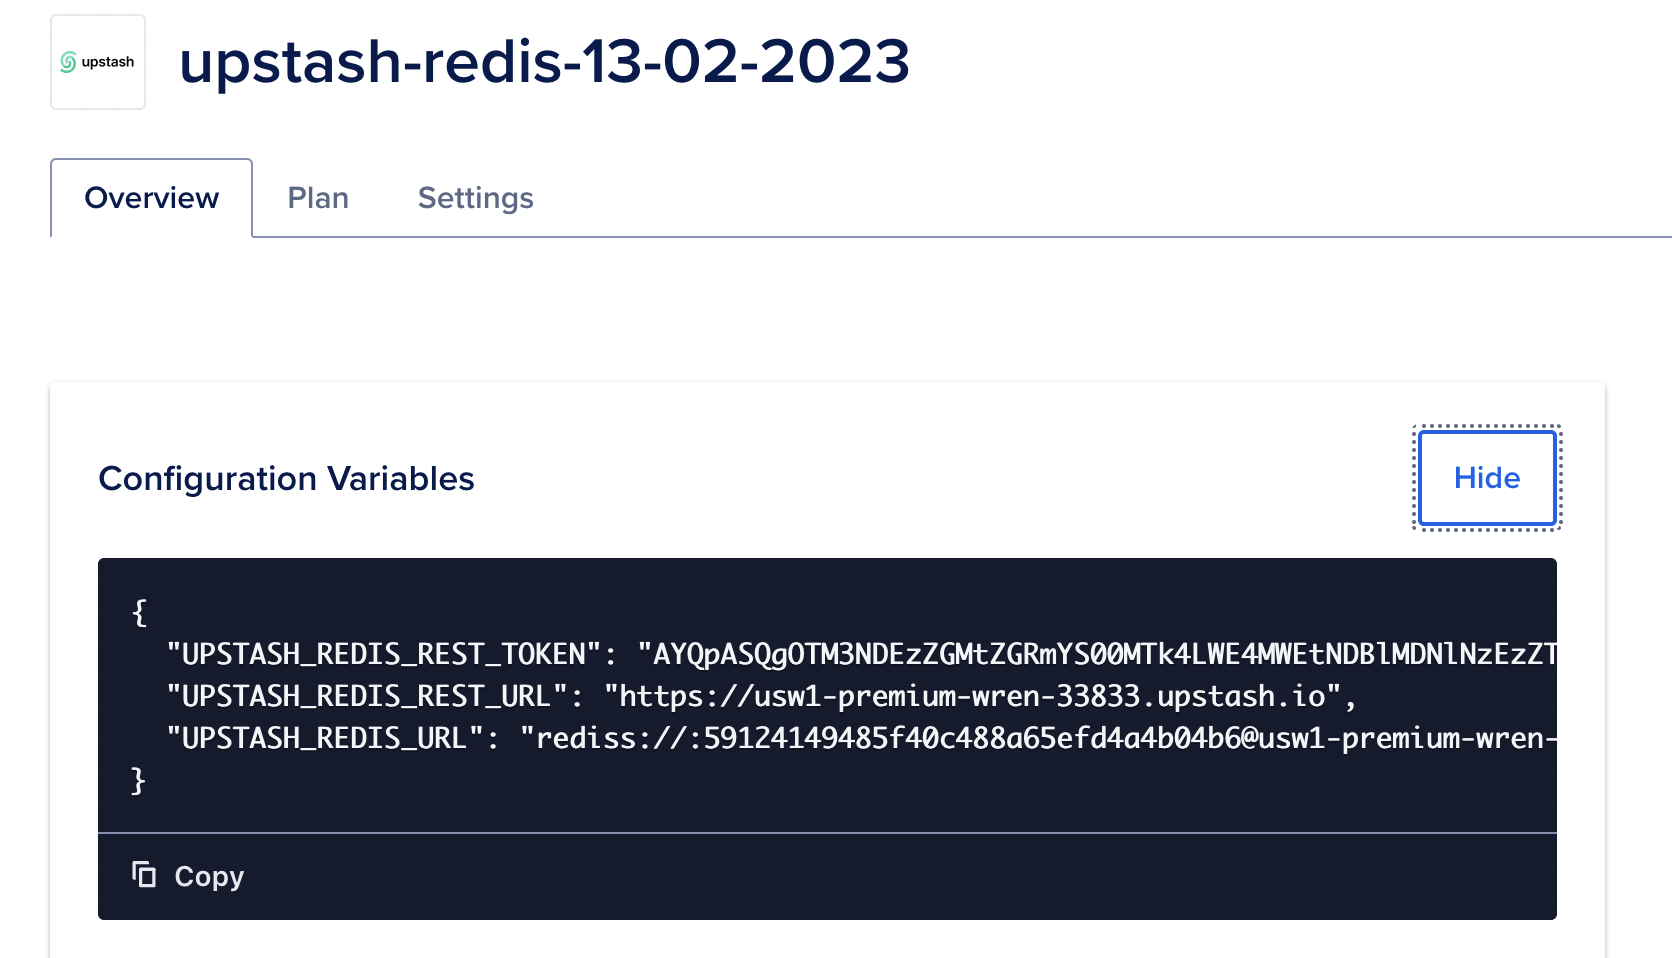
After creating database, Overview/Details page will be opened.
Environment variables can be shown in that page.
After selecting Name, Plan and Region, click `Add Upstash Redis` button.
### Connecting to Database - SSO
After creating database, Overview/Details page will be opened.
Environment variables can be shown in that page.
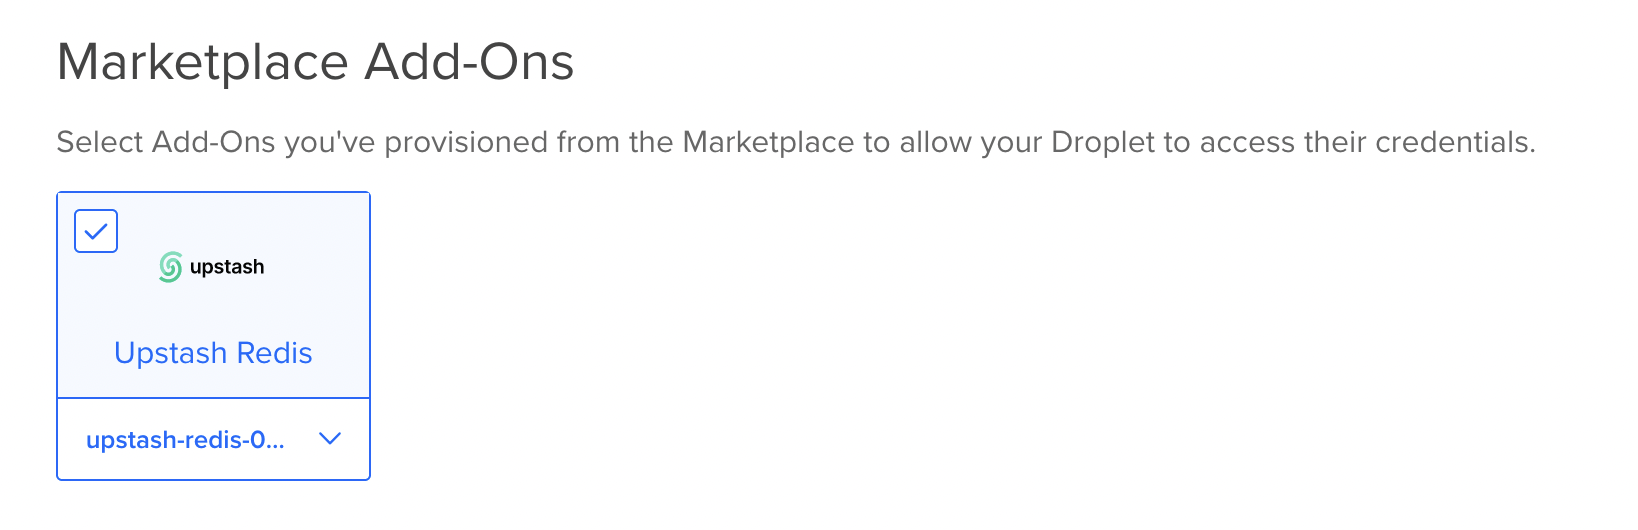
 While creating a Droplet, Upstash Addon can be selected and environment
variables are automatically injected to Droplet.
These Steps can be followed: `Create --> Droplets --> Marketplace Add-Ons` then
select the previously created Upstash Redis Addon.
While creating a Droplet, Upstash Addon can be selected and environment
variables are automatically injected to Droplet.
These Steps can be followed: `Create --> Droplets --> Marketplace Add-Ons` then
select the previously created Upstash Redis Addon.
 Upstash also support Single Sign-On from DigitalOcean to Upstash Console.
So databases created from DigitalOcean can benefit from Upstash Console
features.
In order to access Upstash Console from DigitalOcean just click `Dashboard` link
when you create the Upstash addon.
Upstash also support Single Sign-On from DigitalOcean to Upstash Console.
So databases created from DigitalOcean can benefit from Upstash Console
features.
In order to access Upstash Console from DigitalOcean just click `Dashboard` link
when you create the Upstash addon.