> ## Documentation Index
> Fetch the complete documentation index at: https://upstash-fix-issues-on-docs.mintlify.site/llms.txt
> Use this file to discover all available pages before exploring further.
# Using AWS SAM
This tutorial implements a serverless application and deploy it to AWS Lambda
using AWS SAM.
See [Using Serverless Framework](/redis/tutorials/using_serverless_framework),
if you prefer Serverless Framework over SAM.
### Step 1: Create database on Upstash
If you do not have one, create a database following this
[guide](../overall/getstarted).
### Step 2: Project Setup
If you do not have it already install AWS SAM as described
[here](https://docs.aws.amazon.com/serverless-application-model/latest/developerguide/serverless-sam-cli-install-mac.html)
In any folder run `sam init` and select `Hello World Example` as below:
```shell
➜ serverless-tutorials > ✗ sam init
SAM CLI now collects telemetry to better understand customer needs.
You can OPT OUT and disable telemetry collection by setting the
environment variable SAM_CLI_TELEMETRY=0 in your shell.
Thanks for your help!
Learn More: https://docs.aws.amazon.com/serverless-application-model/latest/developerguide/serverless-sam-telemetry.html
Which template source would you like to use?
1 - AWS Quick Start Templates
2 - Custom Template Location
Choice: 1
What package type would you like to use?
1 - Zip (artifact is a zip uploaded to S3)
2 - Image (artifact is an image uploaded to an ECR image repository)
Package type: 1
Which runtime would you like to use?
1 - nodejs14.x
2 - python3.8
3 - ruby2.7
4 - go1.x
5 - java11
6 - dotnetcore3.1
7 - nodejs12.x
8 - nodejs10.x
9 - python3.7
10 - python3.6
11 - python2.7
12 - ruby2.5
13 - java8.al2
14 - java8
15 - dotnetcore2.1
Runtime: 1
Project name [sam-app]: using-aws-sam
Cloning app templates from https://github.com/aws/aws-sam-cli-app-templates
AWS quick start application templates:
1 - Hello World Example
2 - Step Functions Sample App (Stock Trader)
3 - Quick Start: From Scratch
4 - Quick Start: Scheduled Events
5 - Quick Start: S3
6 - Quick Start: SNS
7 - Quick Start: SQS
8 - Quick Start: Web Backend
Template selection: 1
-----------------------
Generating application:
-----------------------
Name: using-aws-sam
Runtime: nodejs14.x
Dependency Manager: npm
Application Template: hello-world
Output Directory: .
Next steps can be found in the README file at ./using-aws-sam/README
```
Inside the hello-world folder install the redis client with:
```
npm install ioredis
```
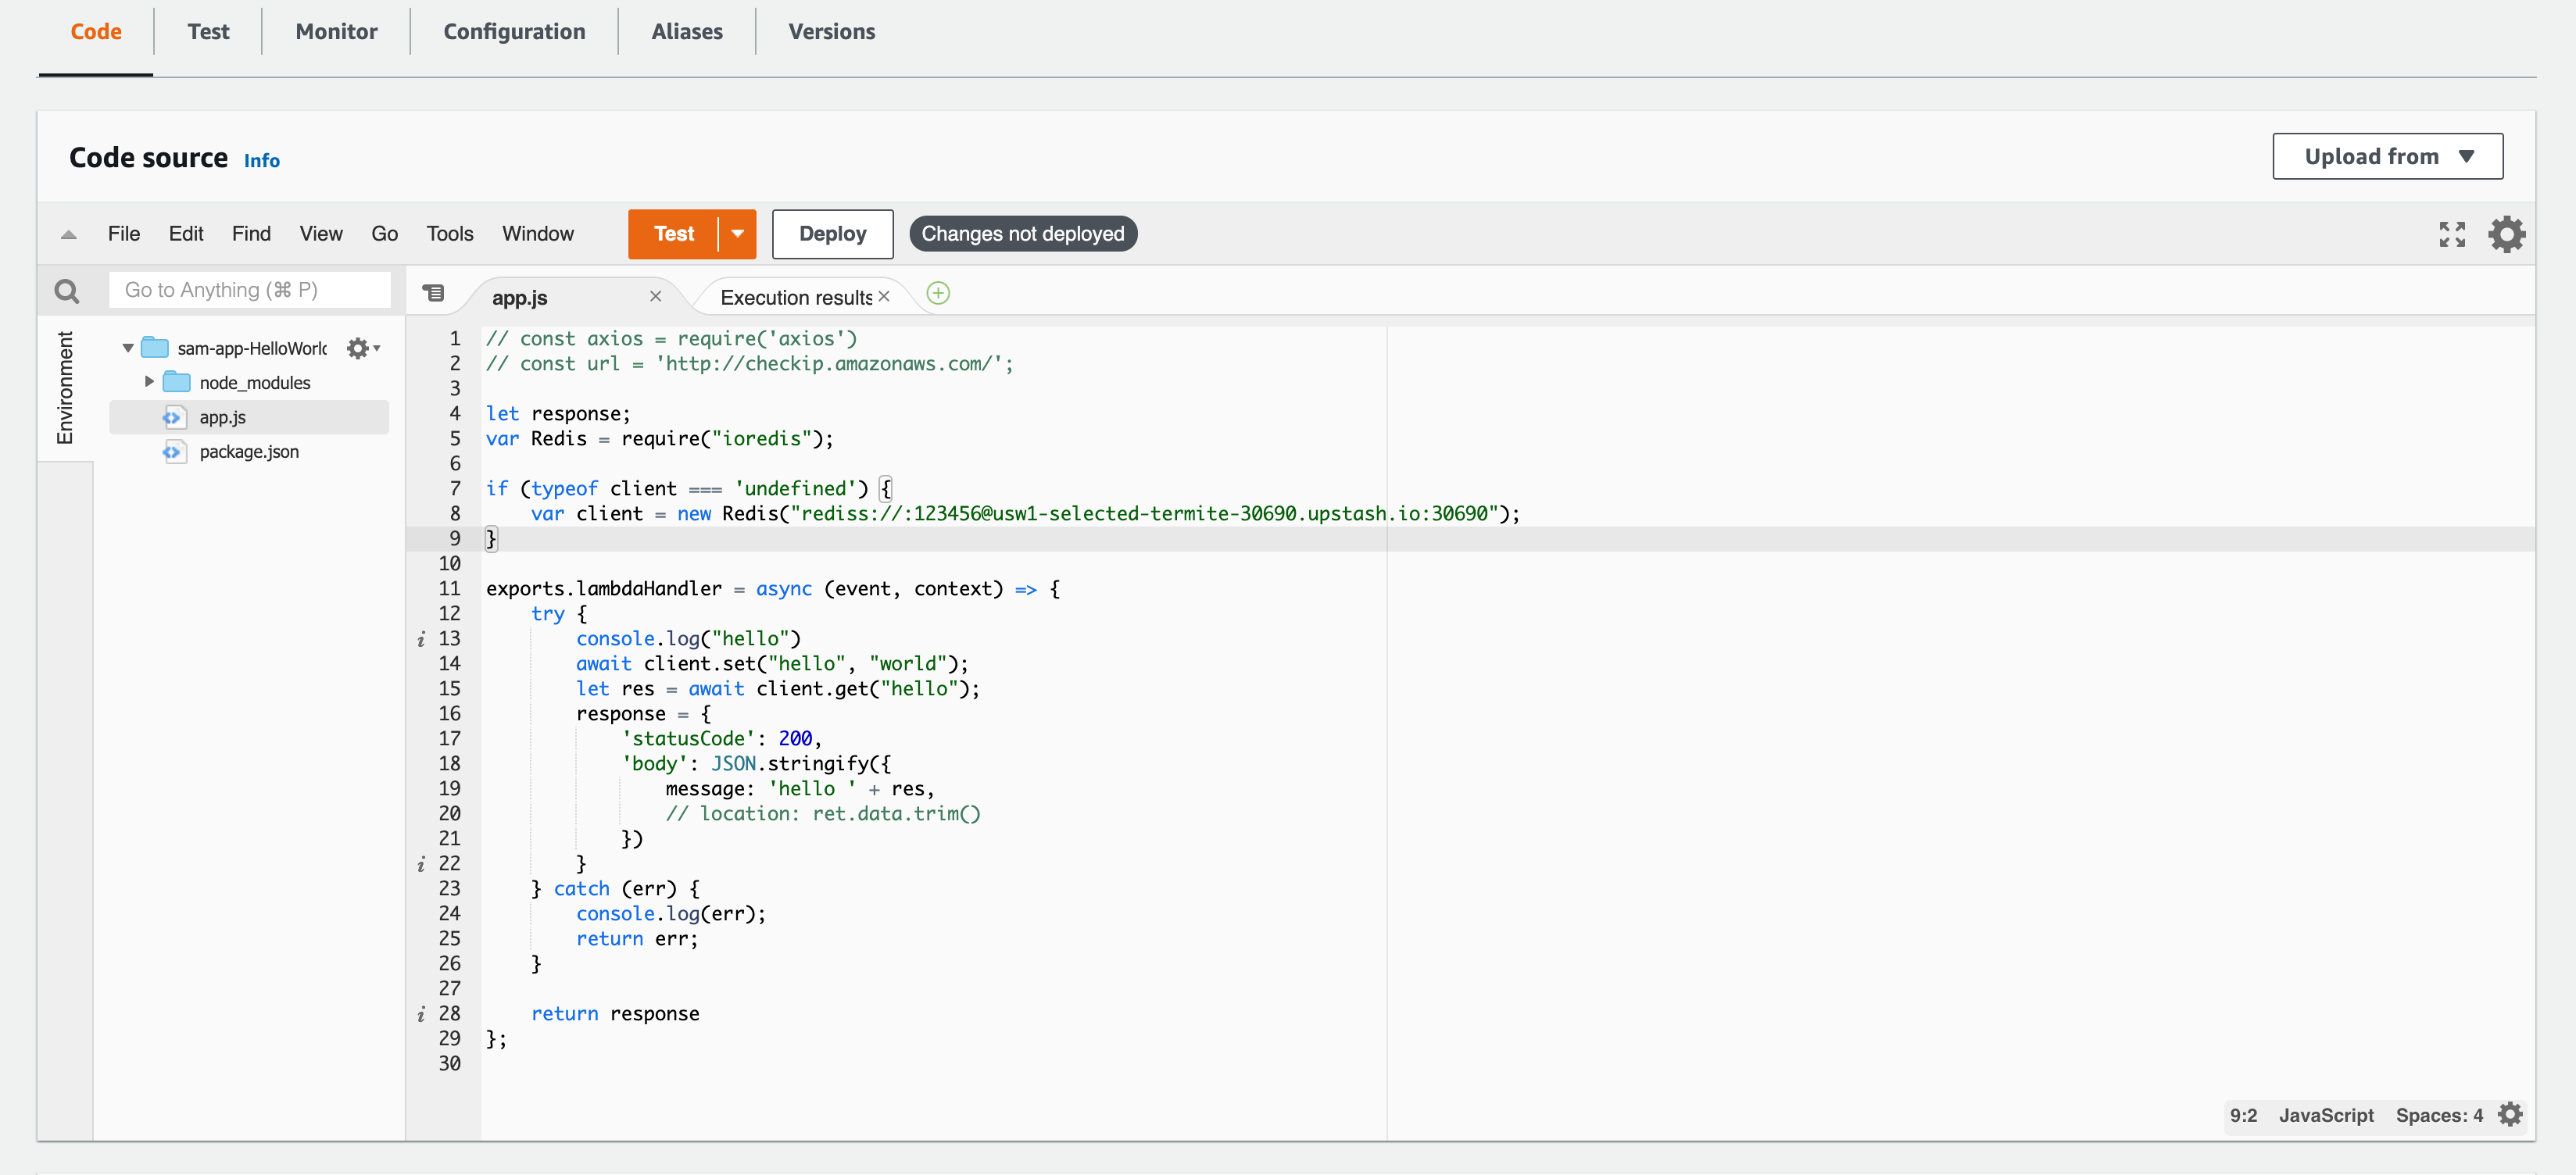
Edit hello-world>app.js file as below. Replace the Redis URL (copy ioredis url
from your Upstash console).
```javascript
let response;
var Redis = require("ioredis");
if (typeof client === "undefined") {
var client = new Redis(REDIS_URL);
}
exports.lambdaHandler = async (event, context) => {
try {
console.log("hello");
await client.set("hello", "world");
let res = await client.get("hello");
response = {
statusCode: 200,
body: JSON.stringify({
message: "hello " + res,
// location: ret.data.trim()
}),
};
} catch (err) {
console.log(err);
return err;
}
return response;
};
```
### Step 3: Deploy Your Function
In the project folder run:
```
sam build
```
The output will be:
```shell
➜ using-aws-sam git:(master) ✗ sam build
Building codeuri: /Users/enes/dev/serverless-tutorials/using-aws-sam/hello-world runtime: nodejs14.x metadata: {} functions: ['HelloWorldFunction']
Running NodejsNpmBuilder:NpmPack
Running NodejsNpmBuilder:CopyNpmrc
Running NodejsNpmBuilder:CopySource
Running NodejsNpmBuilder:NpmInstall
Running NodejsNpmBuilder:CleanUpNpmrc
Build Succeeded
Built Artifacts : .aws-sam/build
Built Template : .aws-sam/build/template.yaml
Commands you can use next
=========================
[*] Invoke Function: sam local invoke
[*] Deploy: sam deploy --guided
```
Deploy your function via `sam deploy --guided`.
You can run your function locally with `sam local invoke`
You can also test your function using AWS console. In your AWS Lambda section,
click on your function. Scroll down to the code sections and click on the `Test`
button on the top right.
 Congratulations, now your lambda function inserts entry to your Upstash
database.
### What can be the next?
* You can write and deploy another function to just get values from the
database.
* You can integrate
[API Gateway](https://docs.aws.amazon.com/apigateway/latest/developerguide/api-gateway-create-api-as-simple-proxy-for-lambda.html)
so you can call your function via http.
* You can learn about how to monitor your functions from CloudWatch as described
[here](https://docs.aws.amazon.com/lambda/latest/dg//monitoring-functions-logs.html).
#### Redis Connections in AWS Lambda
Although Redis connections are very lightweight, a new connection inside each
Lambda function can cause a notable latency. On the other hand, reusing Redis
connections inside the AWS Lambda functions has its own drawbacks. When AWS
scales out Lambda functions, the number of open connections can rapidly
increase. Fortunately, Upstash detects and terminates the idle and zombie
connections thanks to its smart connection handling algorithm. Thanks to this
algorithm; we have been recommending caching your Redis connection in serverless
functions.
See [the blog post](https://blog.upstash.com/serverless-database-connections)
about the database connections in serverless functions.
Congratulations, now your lambda function inserts entry to your Upstash
database.
### What can be the next?
* You can write and deploy another function to just get values from the
database.
* You can integrate
[API Gateway](https://docs.aws.amazon.com/apigateway/latest/developerguide/api-gateway-create-api-as-simple-proxy-for-lambda.html)
so you can call your function via http.
* You can learn about how to monitor your functions from CloudWatch as described
[here](https://docs.aws.amazon.com/lambda/latest/dg//monitoring-functions-logs.html).
#### Redis Connections in AWS Lambda
Although Redis connections are very lightweight, a new connection inside each
Lambda function can cause a notable latency. On the other hand, reusing Redis
connections inside the AWS Lambda functions has its own drawbacks. When AWS
scales out Lambda functions, the number of open connections can rapidly
increase. Fortunately, Upstash detects and terminates the idle and zombie
connections thanks to its smart connection handling algorithm. Thanks to this
algorithm; we have been recommending caching your Redis connection in serverless
functions.
See [the blog post](https://blog.upstash.com/serverless-database-connections)
about the database connections in serverless functions.