Create Upstash Kafka
First, create an Upstash Kafka cluster and topic following those steps. You will need the endpoint, username and password in the following steps.
Create AWS Lambda Function
Now let’s create an AWS Lambda function. For the best performance, select the same region with Upstash Kafka cluster. We will use Node.js runtime.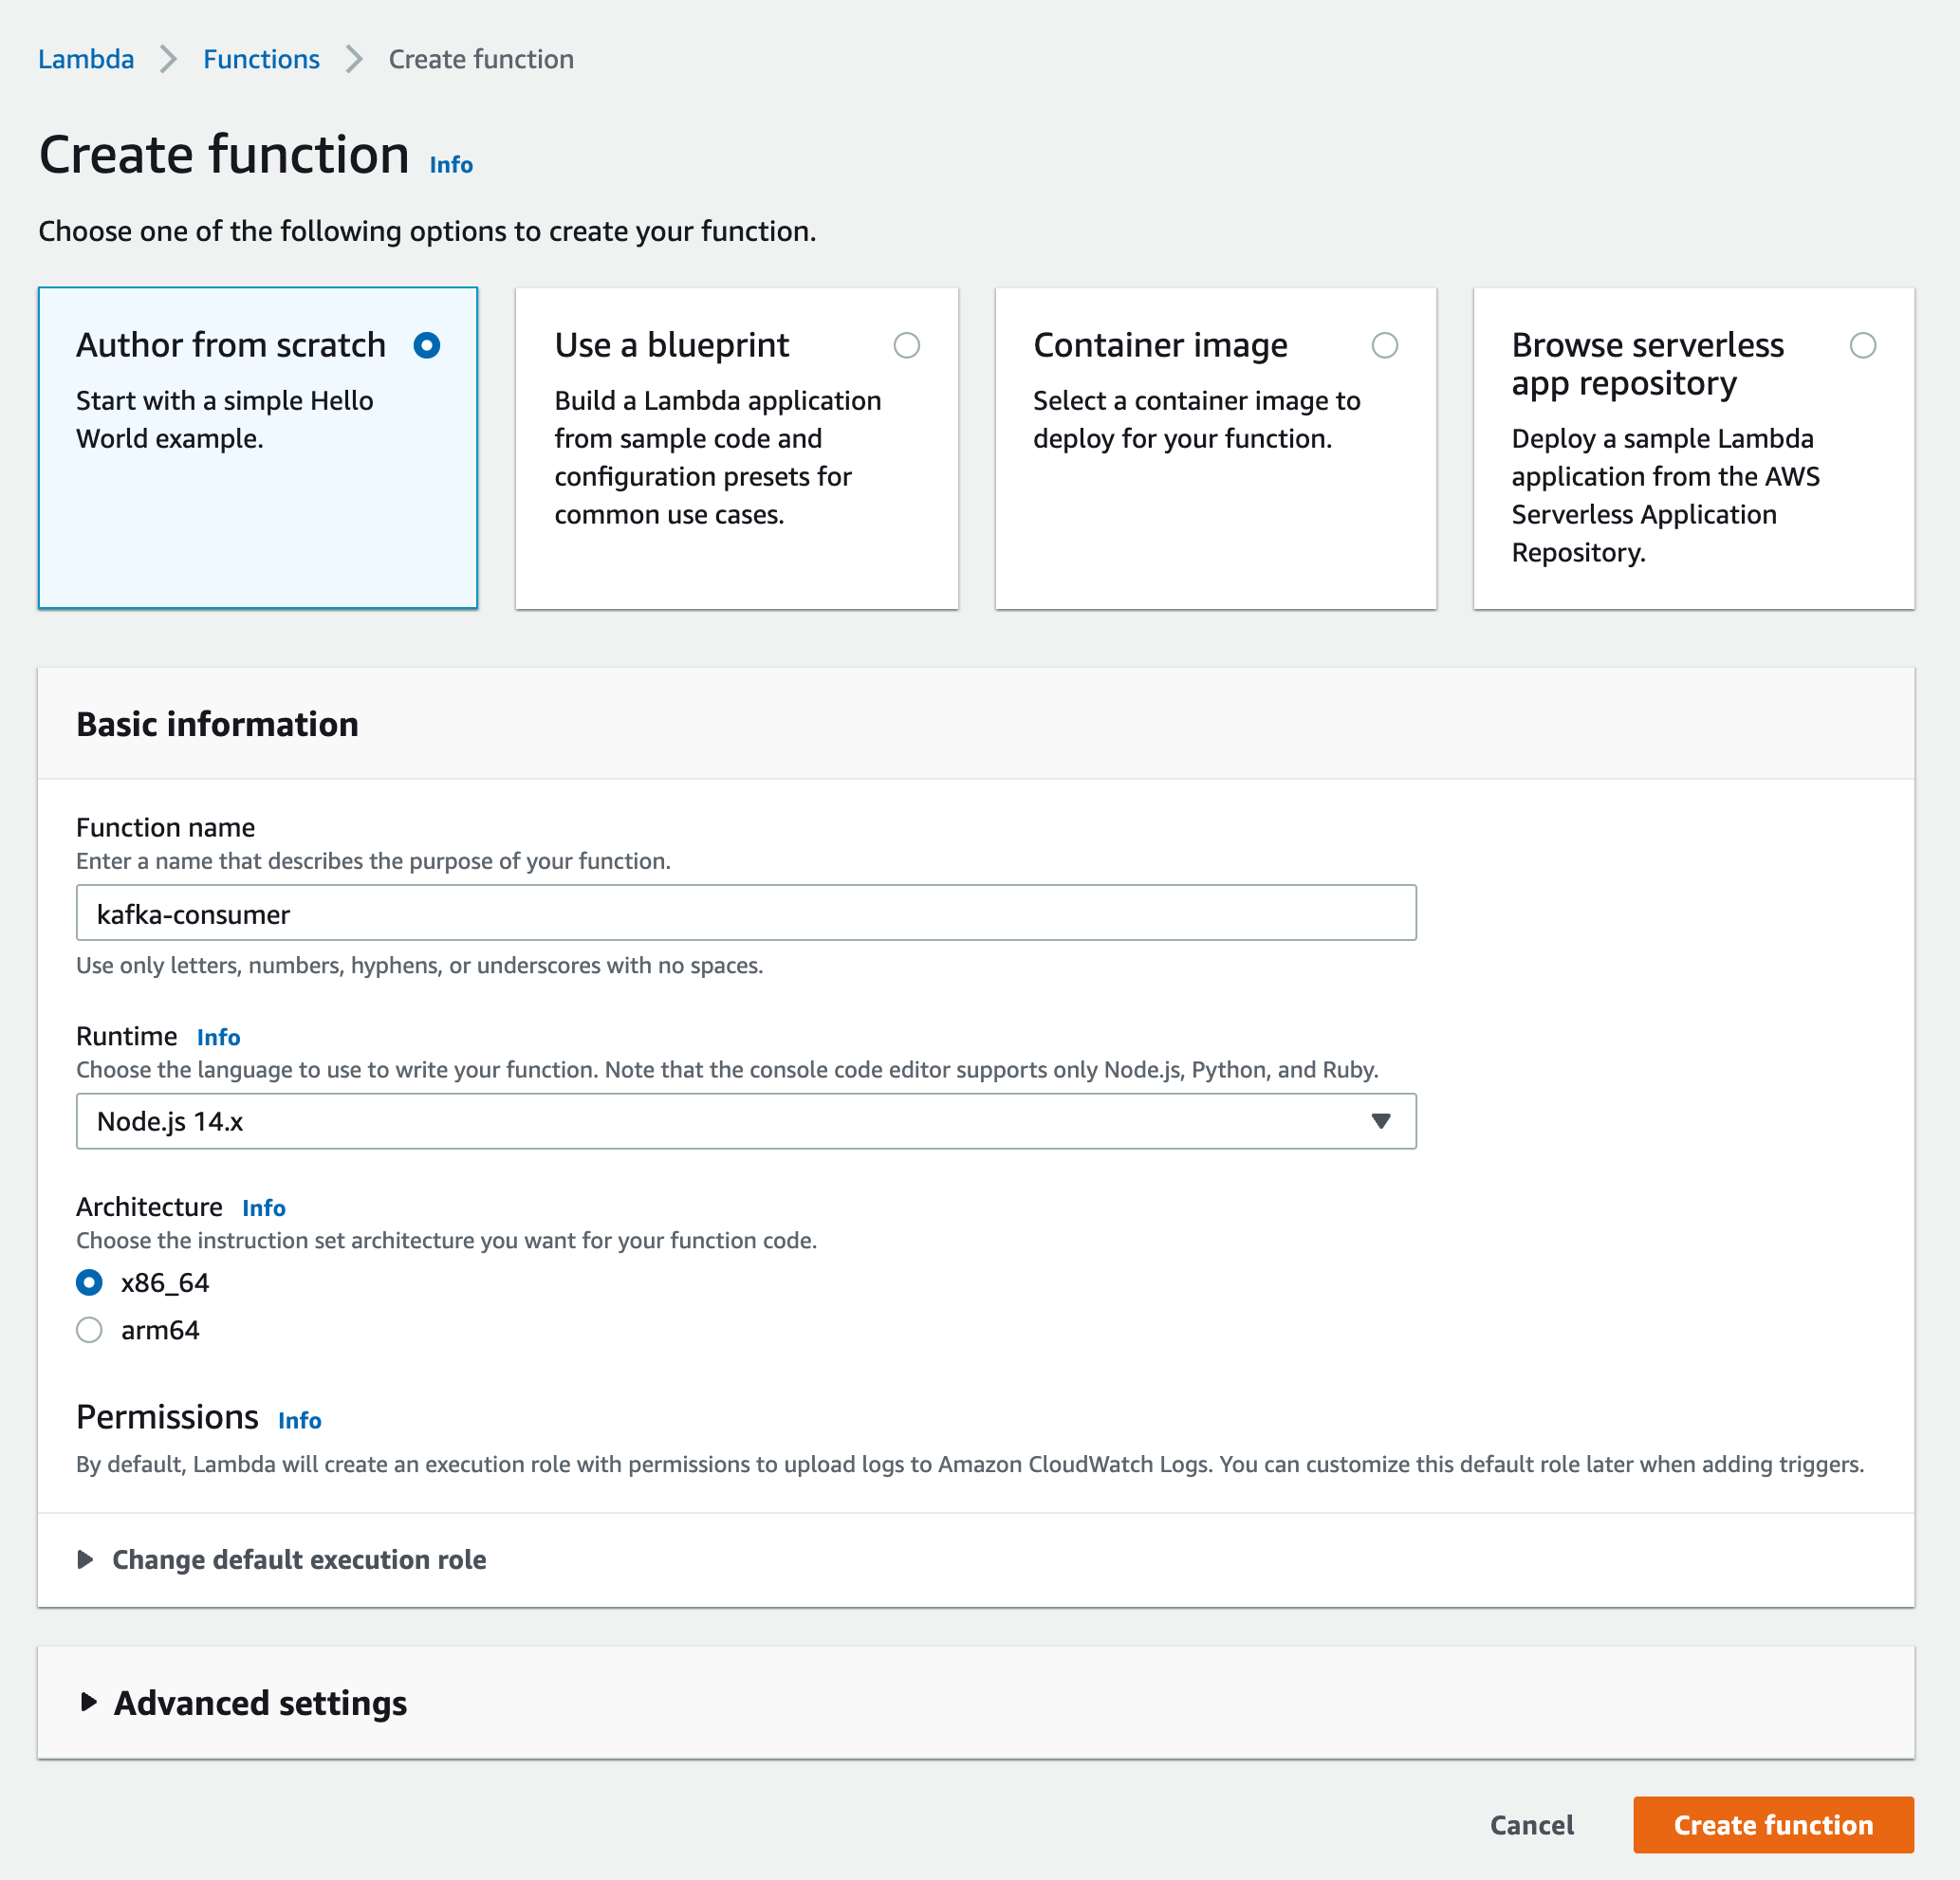
You can use Serverless Framework or AWS SAM for this step.
Lambda Function Code
Update your function’s code as below:base64 so we decode the message and log it to the console.
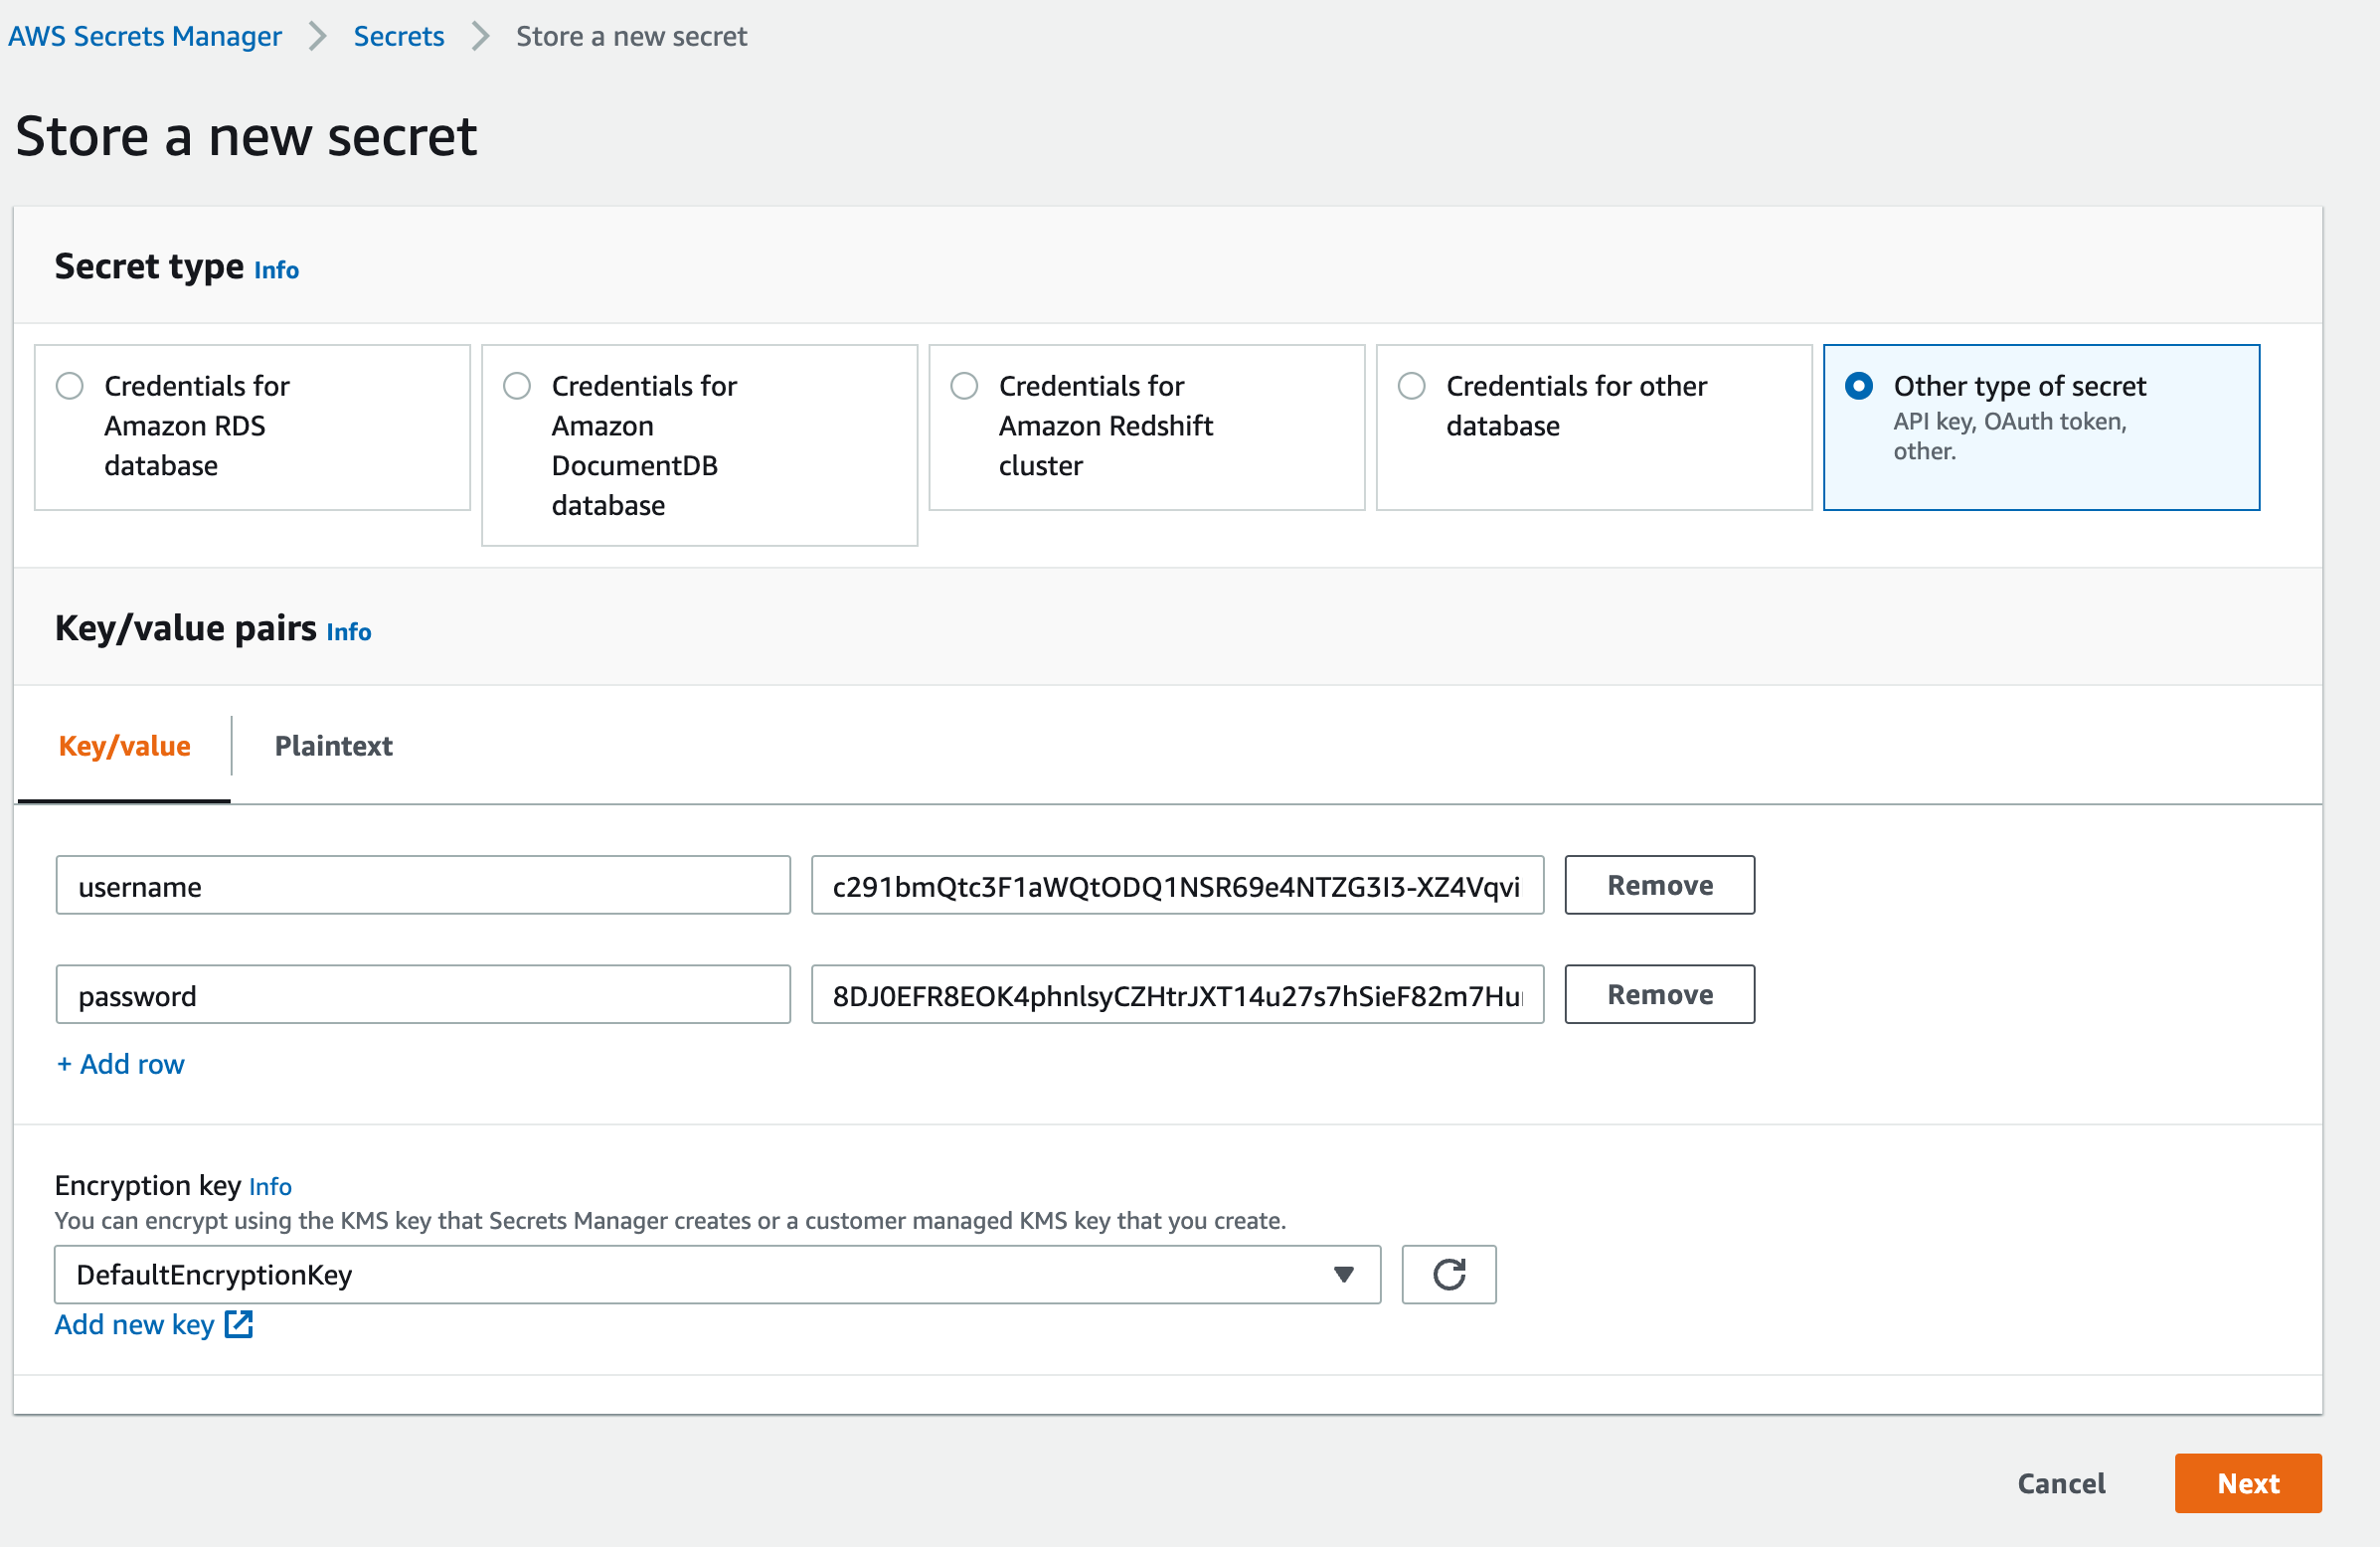
Create AWS Secret
AWS Lambda trigger needs the Kafka credentials to be bundled as a secret. So we will create a secret in AWS Secrets Manager. SelectOther type of secret. Enter your Kafka cluster’s username and password
as key/value pairs as below:

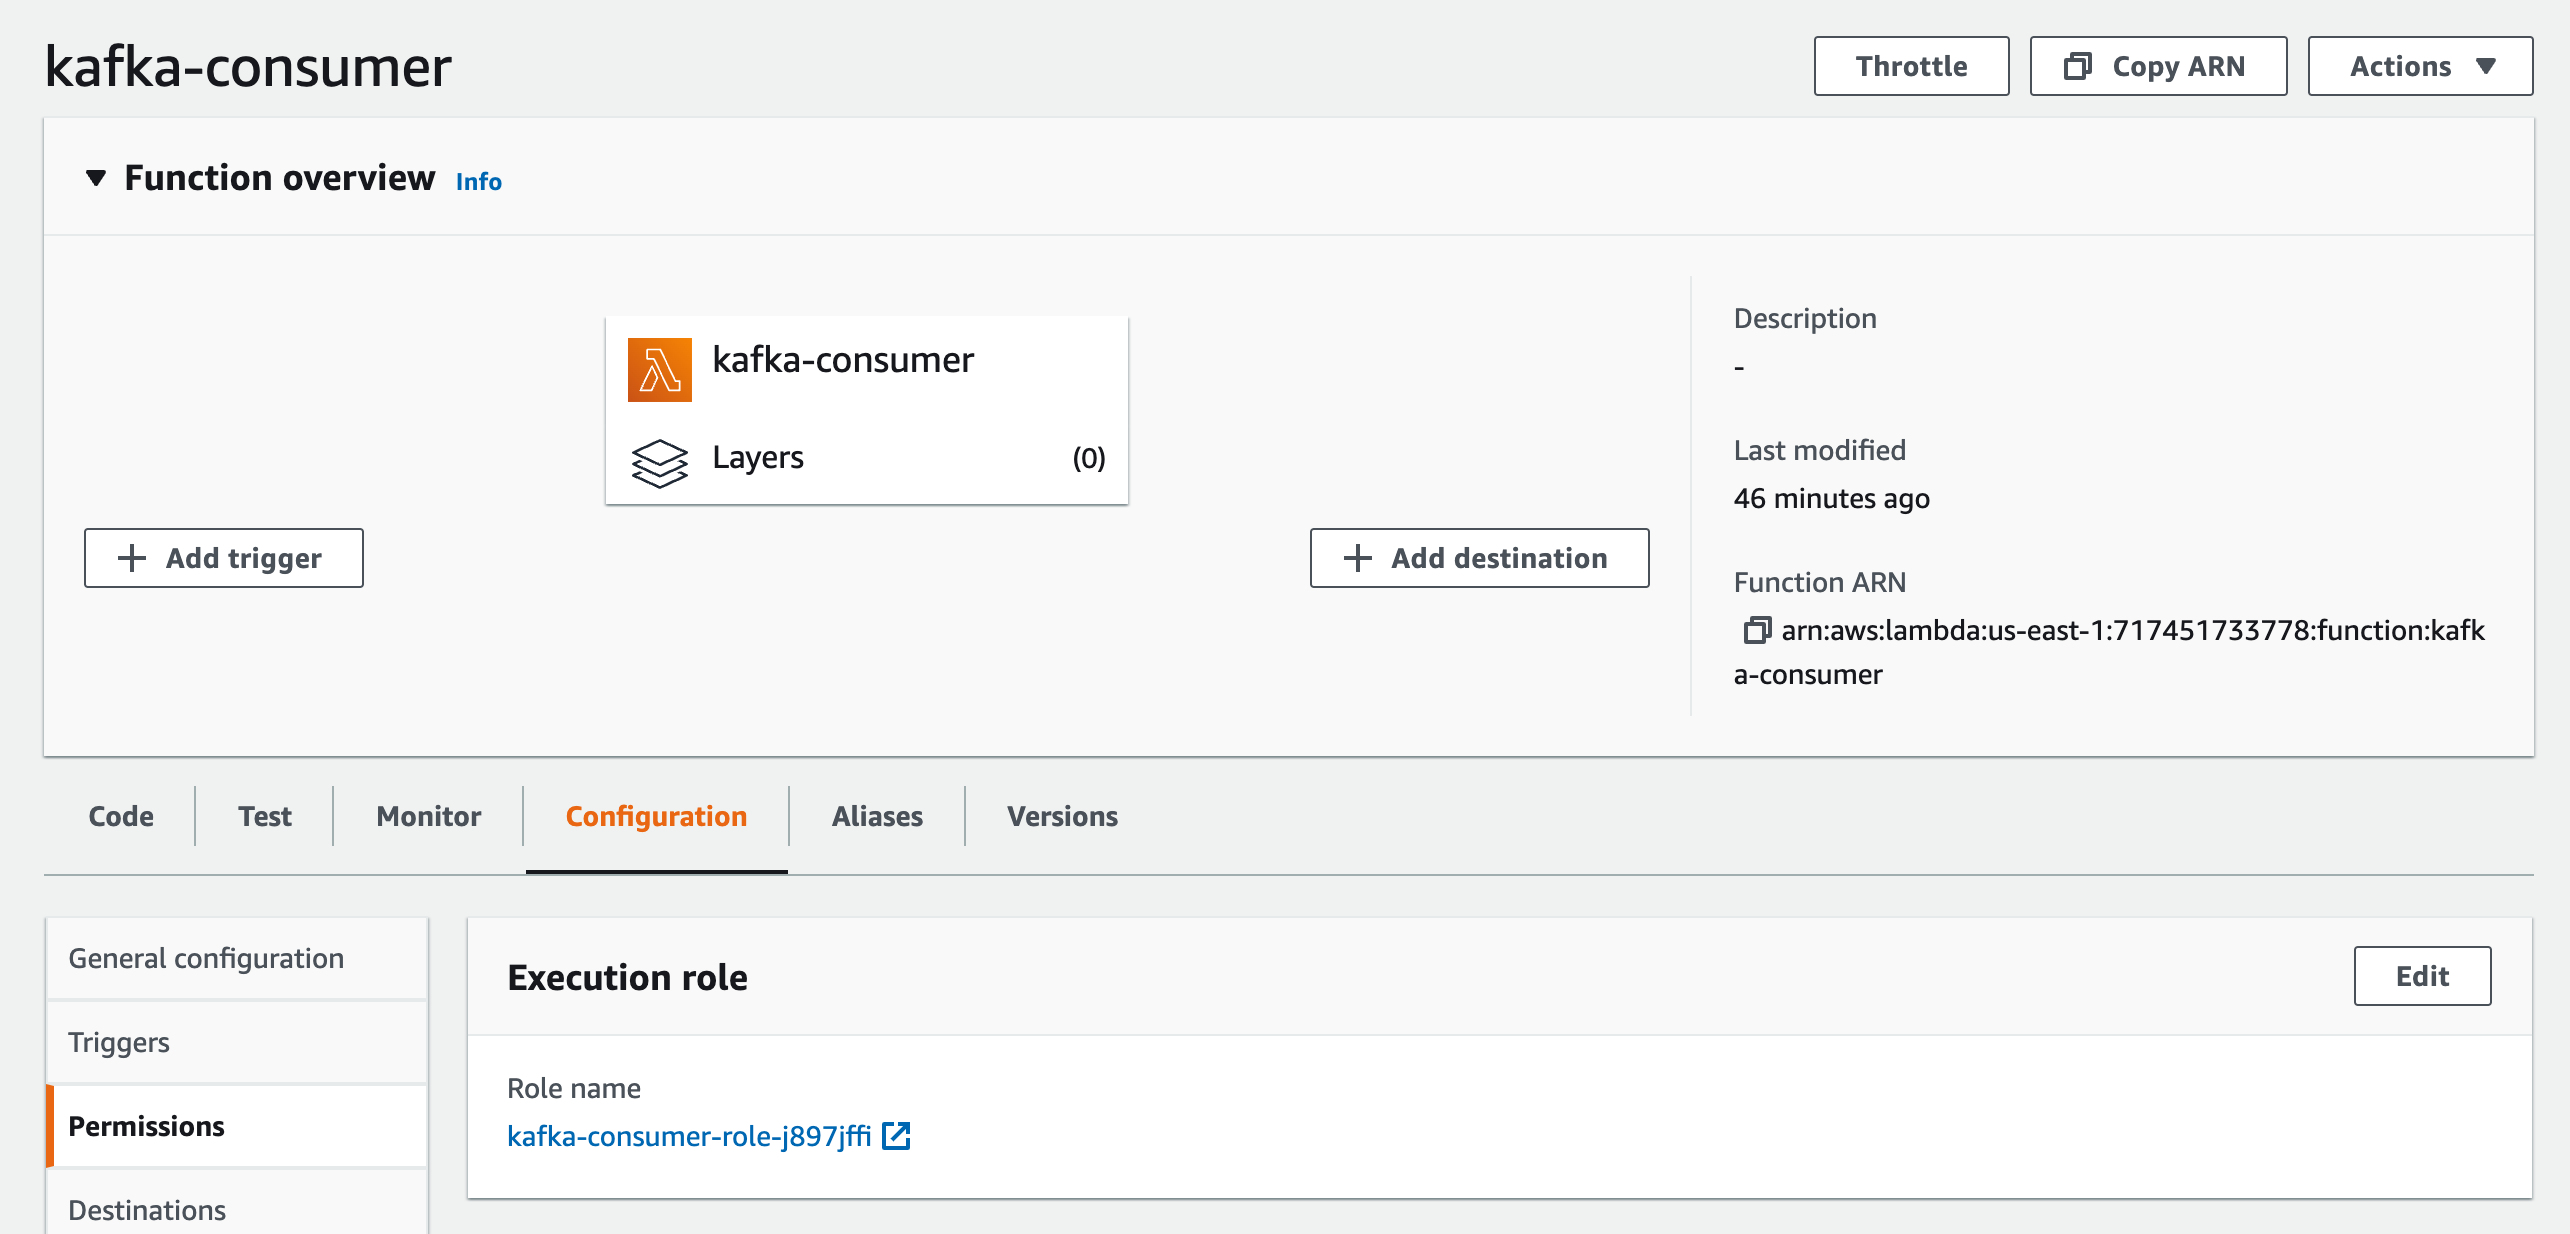
Edit AWS Lambda Role
Now we need to configure the Lambda function’s role to access the secrets. On the AWS Lambda function’s page, click onConfiguration tab and
Permissions. Click to the link just below the Role name label.
Permissions tab
click on the link which starts with AWSLambdaBasicExecutionRole-....

Edit Policy button and add this configuration in the JSON tab:
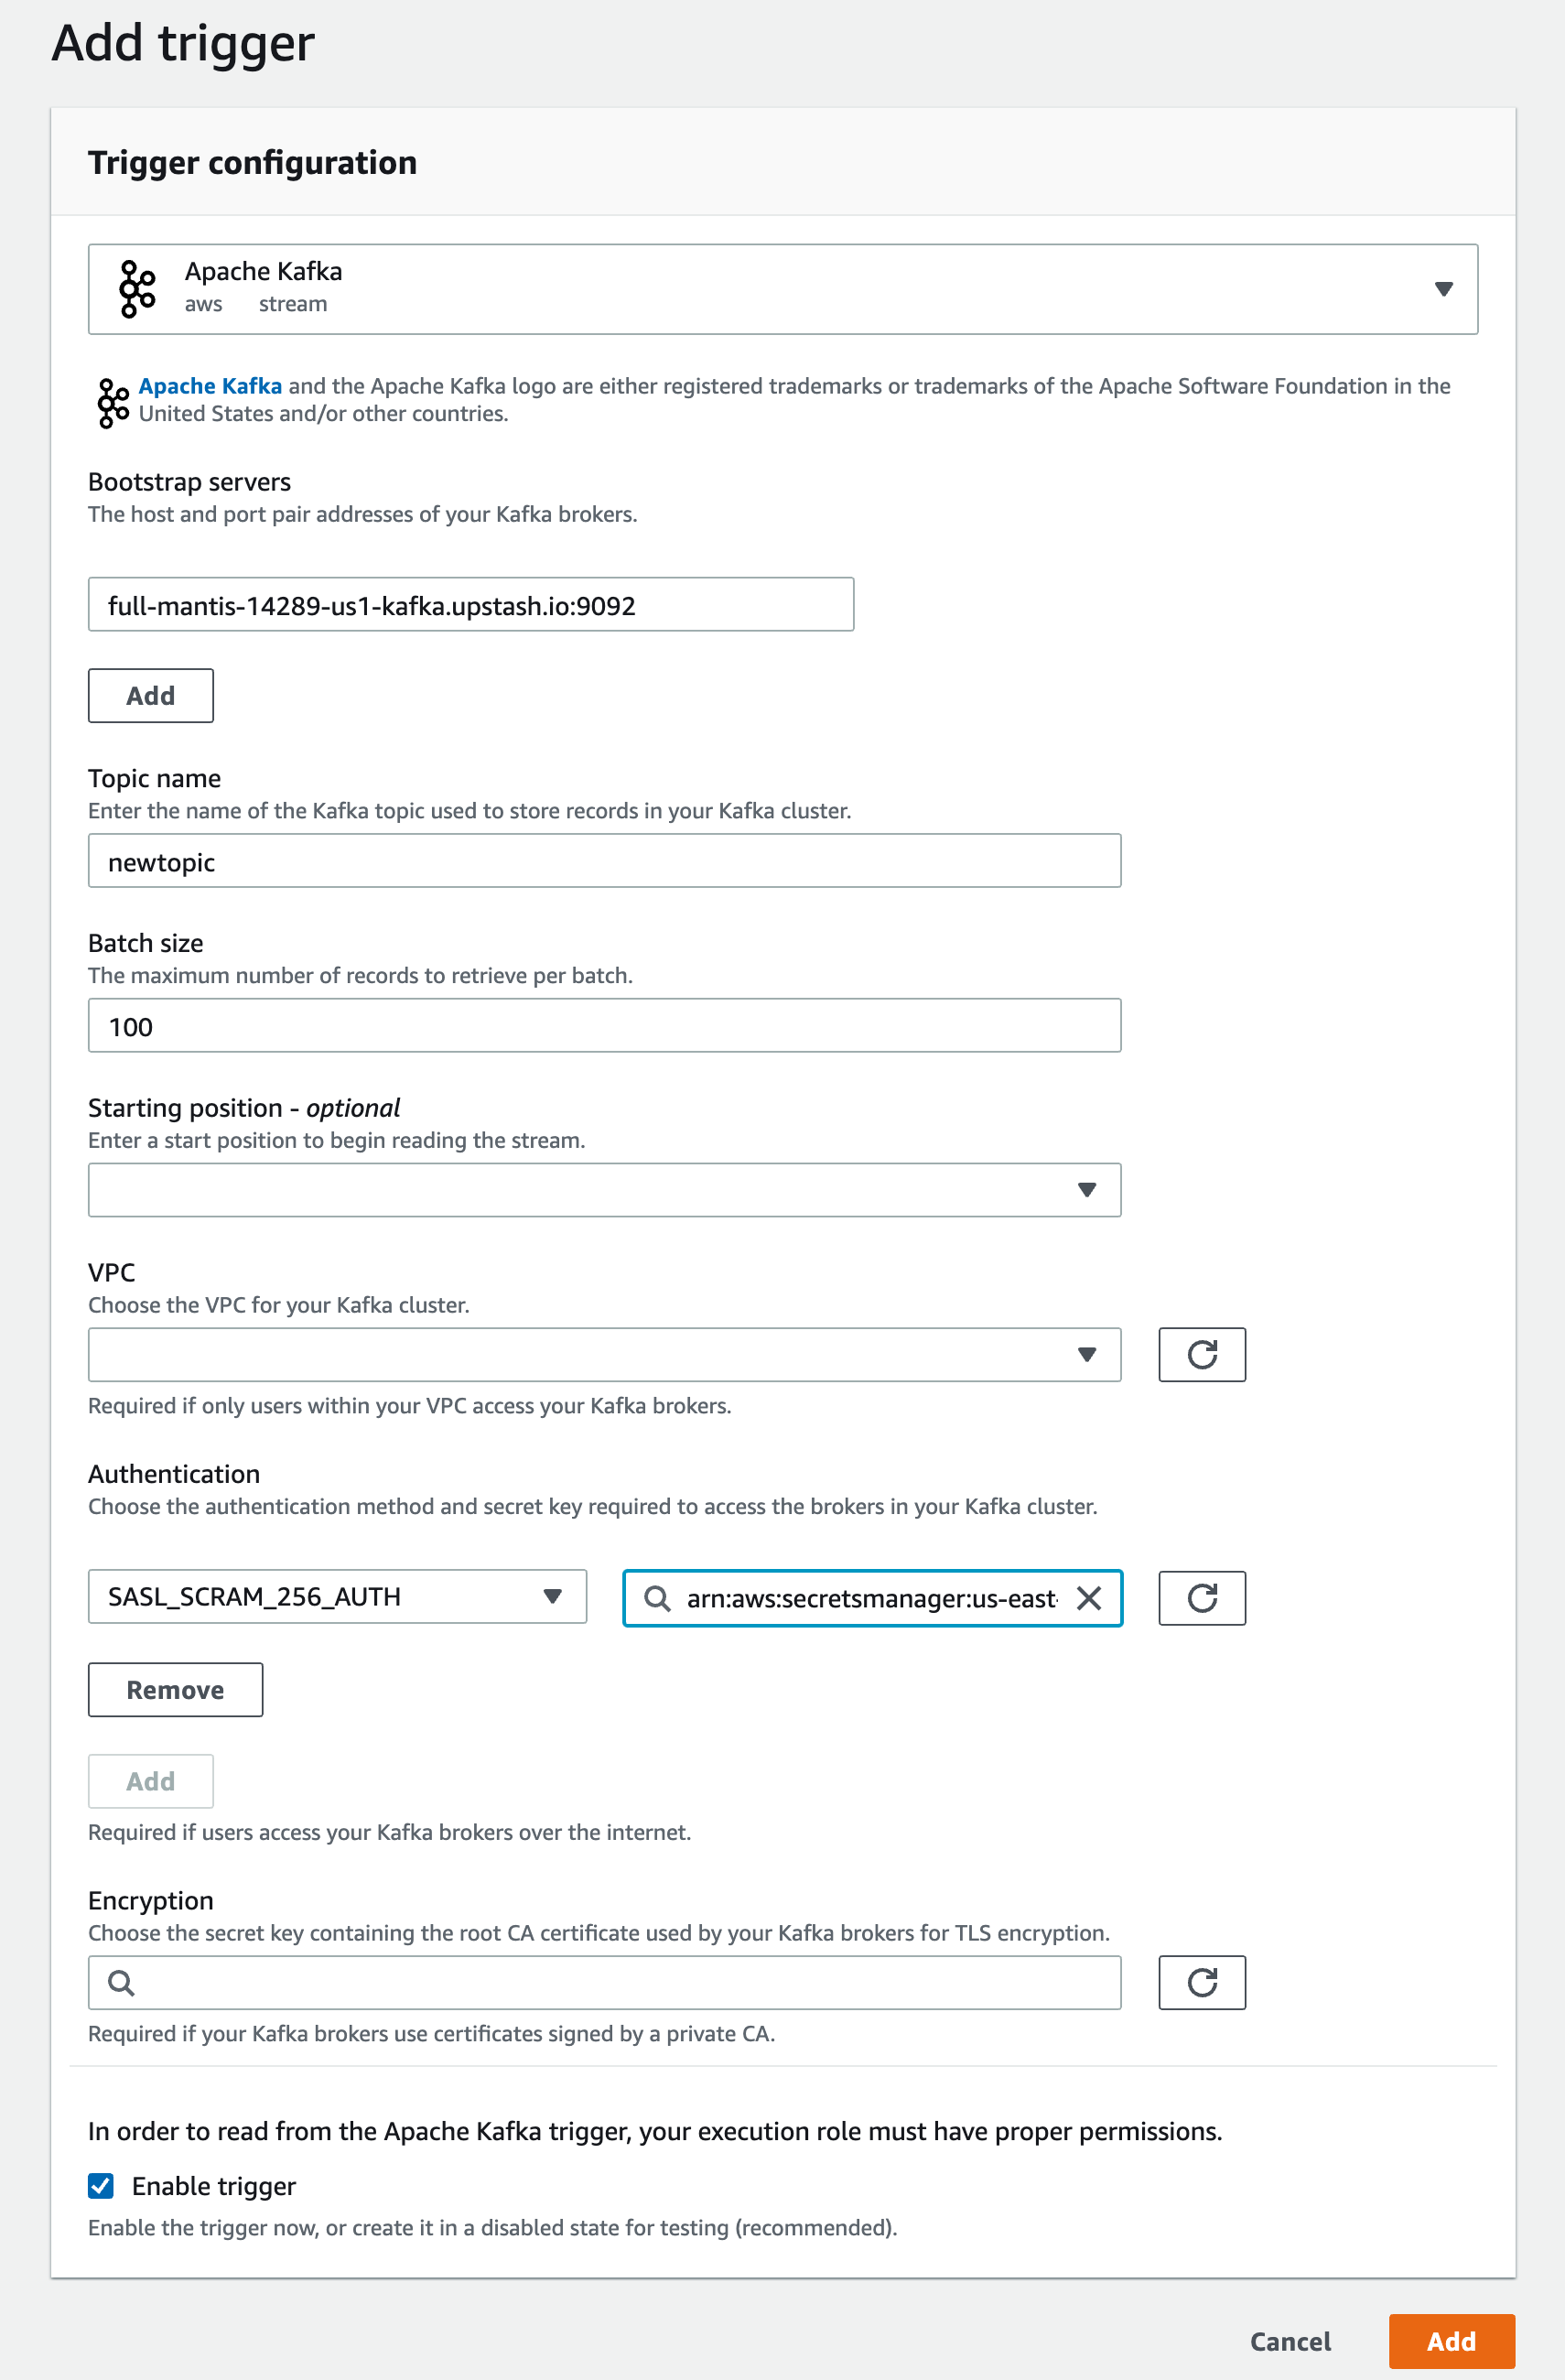
Create the Trigger
Go back to your Lambda functions page and click theAdd trigger button. Select
Apache Kafka from the menu and fill in the inputs.
Bootstrap servers: copy/paste endpoint from Upstash console.
Topic name: enter your topic’s name
Click on the Add button under Authentication. Select SASL_SCRAM_256_AUTH and
select the secret that you created in the previous step.
Check the Enable trigger checkbox and you can leave the remaining inputs as
they are.